
Google Tag Manager is a free tag management tool by which you can easily add a tag for your website.
I have started using this tool after learning about this tool. Every webmaster should use this tool instead of adding code directly in website files.
Sometimes you have to need adding code or script on your website for the various purpose.
But adding more third party code will slow down of your website. Here I give you the solution by which you will get rid.
When You Need To Add Tag?
After creating a website or blog, we have to add some Script or HTML code on our site or blog for connecting with Google Analytic Tool, Google search console, etc.
Suppose you create a new blog, you have to install Google Analytic Tool to view traffic report. Also, You have to submit your blog on Google search console, Bing Webmaster tool to getting organic traffic from search engine. Whenever you submit your blog on search console, you need to verify your website with search console.
To verify your blog with search console you have to add meta tag on your website files. It is very difficult for a non-technical guy. GTM has the great solution who are not familiar with HTML or coding.
What Is Google Tag Manager?
Google Tag Manager is a free tool of Google which also helps to the webmaster. You can manage all script or HTML code in one place.
I have added a video which will help you to the better understanding about GTM.
Here the video:
GTM Section:
Overview: In this section, you can see your recent activity. You can also add a note about your container. GTM provides already 20 types of the tag by default. You will be also able to add custom HTML tag.
Tag: A tag is a code which will send information to a third party, such as Google.
Step By Step Guide To Use Of Google Tag Manager:
Sign In Into Google Tag Manager:
Step 1: Go To Google Tag Manager website and sign in with your google email id and password.
Step 2: After Sign in You need to create an account to manage your all tag.
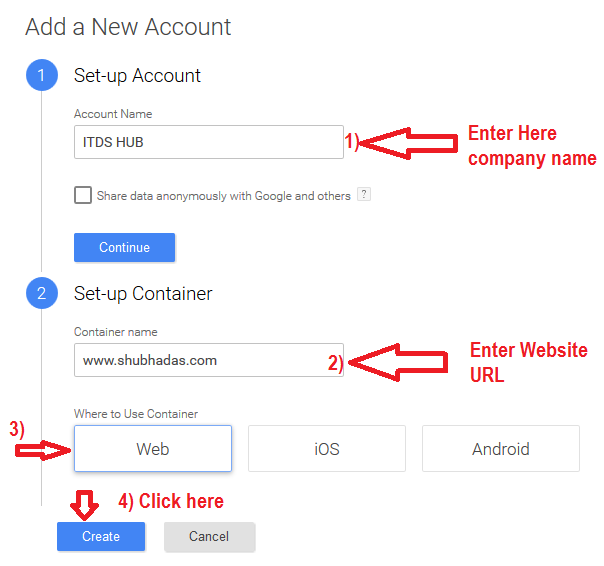
I have added an image below. You will see the form like this.
Account: Account is usually the name of your company. You can manage all container under one account.
1) Here you need to enter an account name and click continue.
2) Set-up Container: Here enter your website name which website you are want to manage tag.
Where To Use Container:
In this section, you need to select where you want to use container. You can use the container for Web, iOS, Android platform. For your blog or website choose the web, then click on Create button.
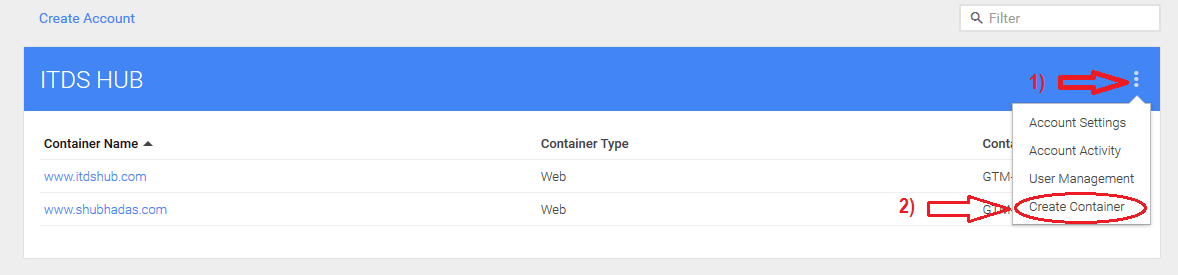
If you have more than one blog, then you need to create another container for a blog. To create simply click follow the image below it will help you to understand better.
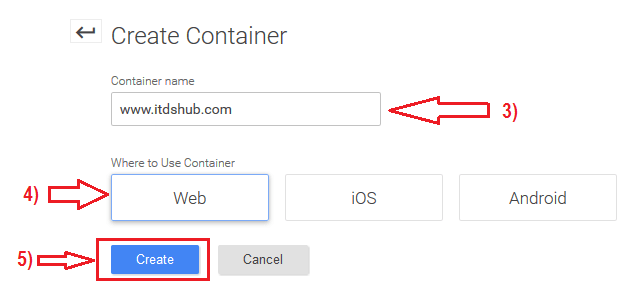
Here enter your details and click save.
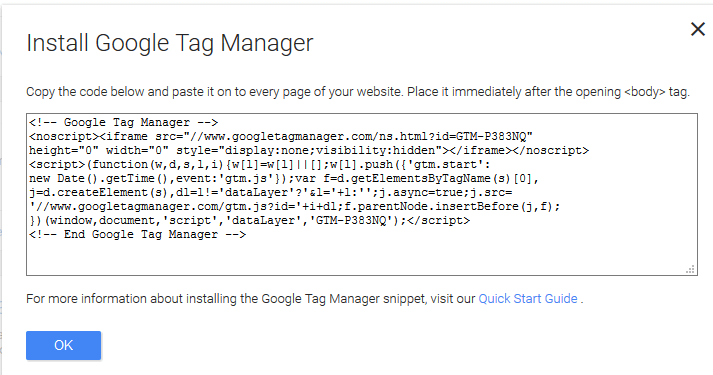
After clicking, you will see a window which includes script. Now you need to install Google Tag Manager on your blog or website.
Install Google Tag Manager On Website:
Now you need to copy the code and paste the code on every page of your website after the opening body tag.
If you have WordPress blog, then you will not need to add every page. Just copy this code and paste it header.php before opening body tag.
However, for the non-technical user, it is not easy to do this way. I have discovered a plugin by which you can easily install GTM on the WordPress blog.
Install Google Tag Manager Using Plugin:
For a non-technical user, the plugin is the easiest way for install Google Tag Manager. Simply Download DuracellTomi’s Google Tag Manager plugin and setup it.
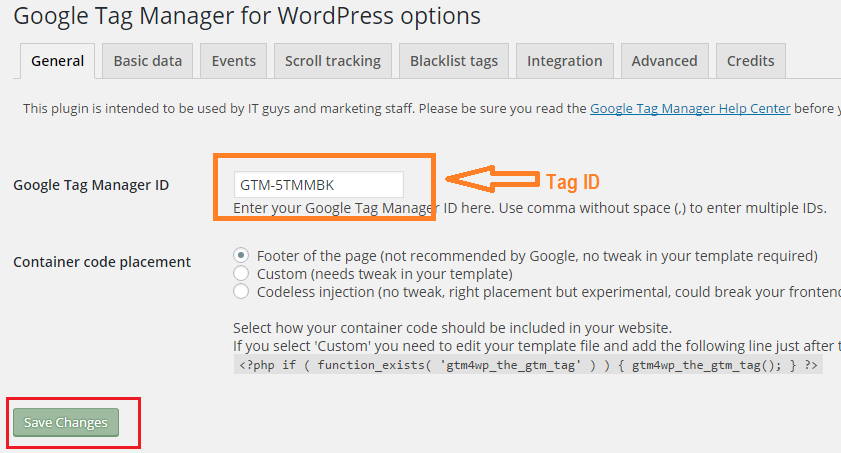
How To Setup DuracellTomi’s Google Tag Manager:
The setup process of this plugin is very easy. You need to add GTM ID in this box. Your container ID is as well as your GTM ID. You will find container ID under account section.
I hope you have completed all the step successfully.
Install Google Analytic Via GTM:
Now I will guide you to how you can install Google Analytics via GTM.
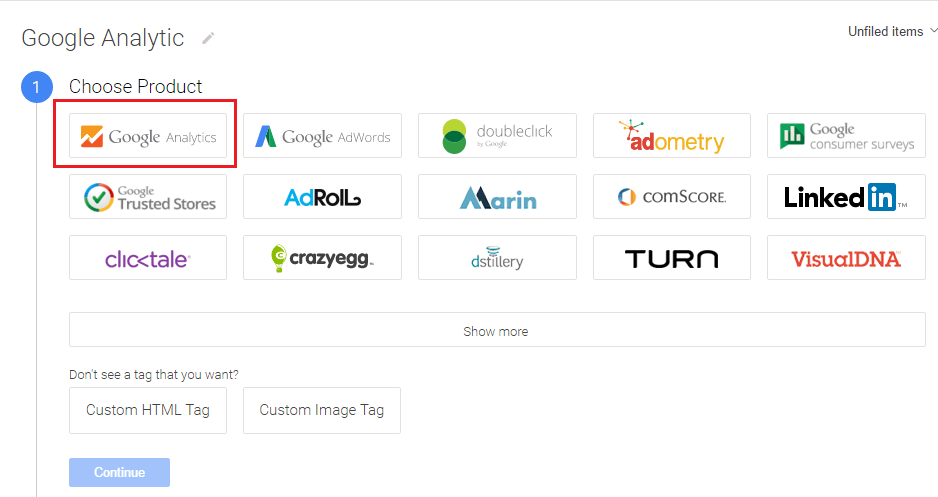
Step 1: Open a container and click on add a new tag button. You will see a screen like see below image. Enter tag name in untitled tag box, I enter Google analytic and then select Google Analytics from the product list.
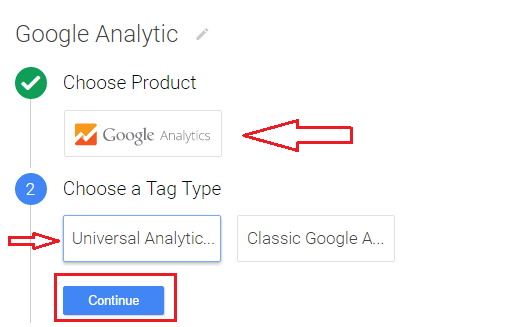
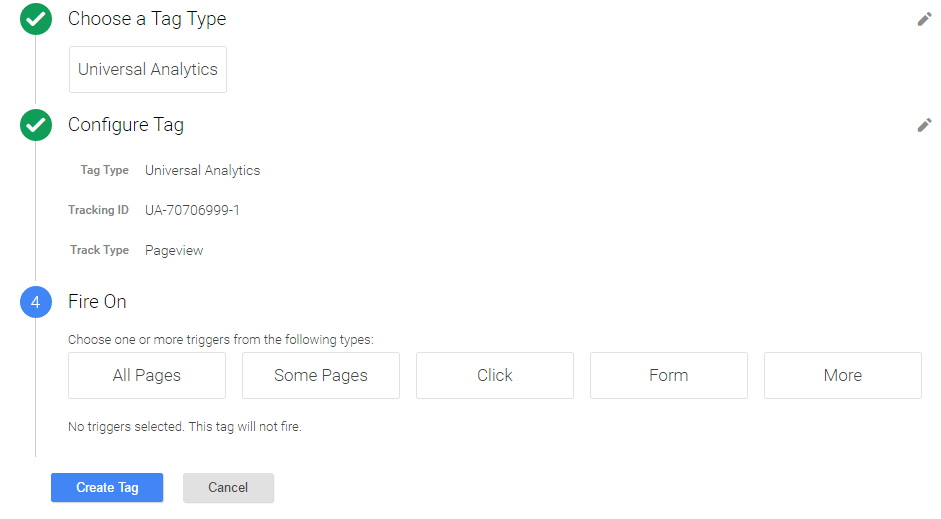
Step 2: Now you have to choose tag type, GTM provides two types of tag type Universal Analytic and Classic Google Analytics. I recommended select universal analytic tag type and click on continue button.
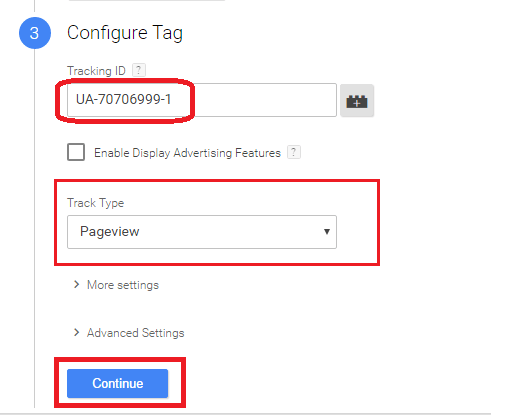
Step 3: In this section, you need to configure your tag. For Google Analytics, here you need to enter tracking ID. You will find your tracking ID on Google analytic profile where you create an analytic profile for your website. Your Google Analytics tracking ID starts with UA-XXXX.
After entering tracking ID, you have to choose tracking type. Simply choose page view from the drop-down and click on continue button.
Step 4: In this step, you need to choose where you want to execute your code. Here, you see a different type of triggers option. For Google, Analytic choose all pages and then click on create a tag.
Step 5: You are almost done all step now the step is publishing your tag which you created.
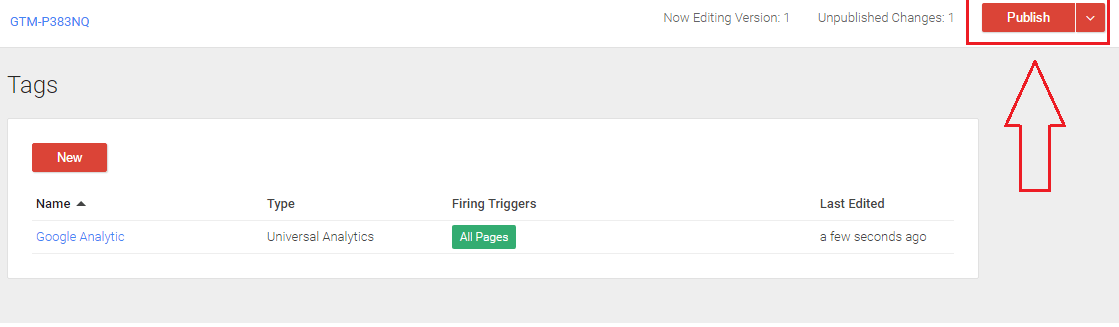
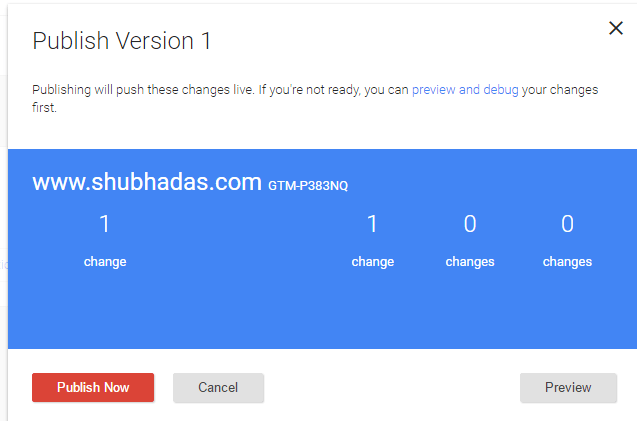
After click on publish now button you will see a new window like below image, i have attached.
Now click on publish now button to finally publish GA via GTM.
If you have any question regarding this tutorial, then feel free to ask me and comment below. I will answer you question as soon as possible.